Celestial Navigation Session #4
In session #3 we began to fill out the form SR-96a using data from our sextant sights measured average height (hs) and time. We then determined the calculated height (Hc) and direction (Zn) from our best estimate of our dead reckoning (DR), assumed position (AP), or known position latitude and longitude. We calculated Local Hour Angle (LHA) from Greenwich Hour Angle (GHA) and declination using data from the Nautical Almanac. We must now complete the sight reduction by plotting on a chart or constant latitude scaled paper to determine our position.
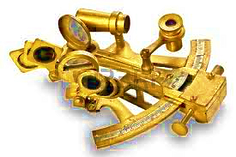
In this session I explain how to find our corrected actual observed height (Ho) and then describe the plotting procedures. For this we will need a protractor, a centimeter scale ruler, some printer size paper or a copy of either the universal plotting sheet, which is available commercially, or form CLS-98.
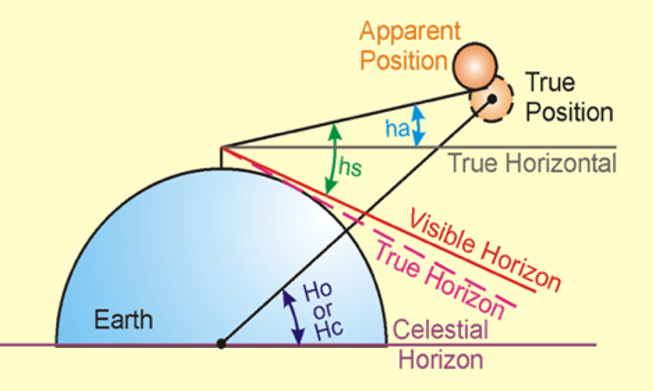
To complete the sight reduction and filling out form SR-96A we must correct the average sextant value of height (hs) for earthly error contributions, the effect of the earth surface curvature, parallax, and atmospheric refraction to get Ho.
Following the sequence in the upper right of SR-96a, we enter the average of sextant sight height measured hs. We then apply the corrections for sextant instrument error (IC), and then using the data on the Almanac yellow pages, subtract the correction for height of eye above the horizon (dip), (i.e. above the water), to obtain an intermediate height value (ha). For all celestial bodies except the moon, using ha we apply the atmospheric refraction (Main) correction to obtain the final value Ho. Since the moon is so close and has faster orbital motion, it requires special treatment beyond the scope of this short session.
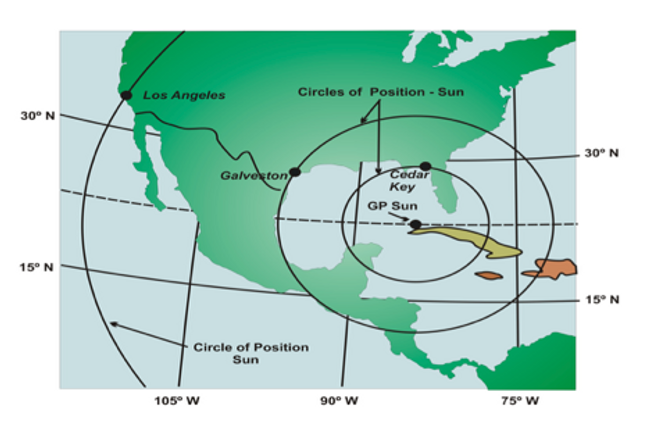
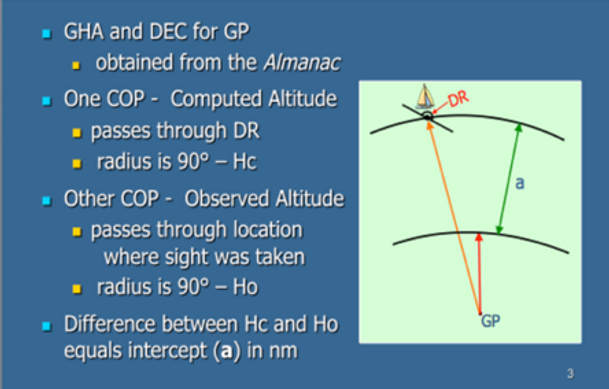
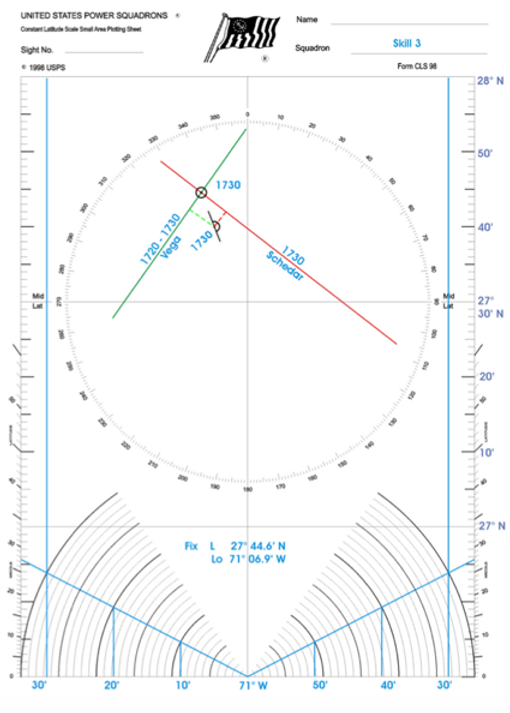
Enter Ho into the lower left of SR-96a and calculate Hc–Ho. This value is called the intercept (a). To understand the meaning of "a" draw a circle to represent the earth circumference on the sphere. A line from the Earth center through our latitude and longitude position in called M for our meridian. A line from the Earth center to the celestial body passes through the earth surface at a point called the Geographic Position (GP), which establishes an angle to our line to M. That angle in degrees between M and GP multiplied by 60 nautical miles per degree is the great circle distance on earth surface between M and GP.
The angle from the surface tangent at M up to the body is Ho. The angle from the vertical at M to the line Ho (90°-Ho) is the same angle as the angle from the earth center to the body. The DR is somewhere near the circle of distance from M to GP centered at GP formed on the surface of earth. Anywhere on that circle will measure the same Ho.
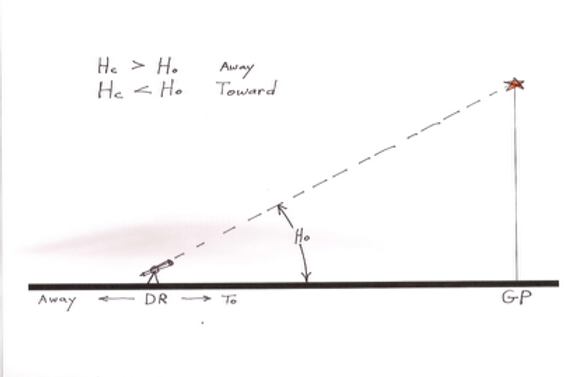
Actually we are on a section of that circle in the direction 180°-Zn since Zn is the direction from M to the GP. The DR is our best prediction of where we are resulting in the calculated height angle Hc, but measured as Ho. The measure (90°-Ho)X 60 is the actual position distance. The difference Hc-Ho is called the intercept "a", the distance from our predicted position to the true position. If "a" is positive, the intercept is “away” from the DR in direction Zn. If "a" is negative then "a" is “toward” the DR in the direction Zn.
To find the true position, we must prepare a plot as if it would be marked on a chart. We only need to plot the intercept (a) from the DR, AP, or the known position to that section of the great circle nearest our DR and read the result.
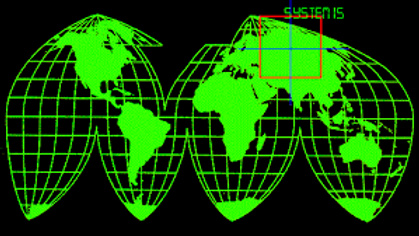
Prior to completing the plot we must prepare a constant latitude scale (we will use CLS-98 form). Mark the center horizontal line with our nearest whole number of latitude nearest our DR. Mark the center vertical line with whole number of longitude nearest our Dr, using the longitude scale on the bottom of the page. Remember that longitude difference scale values narrows from the equator to the poles depending on latitude. See the example slide. Label the latitude and longitude scales on the margins of the page.


If we did the plot on a maritime chart we would get a perspective of our position relative to the charted area. A navigator strives to achieve a position error of less than 2 nautical miles to reach safe harbor. Amateur astronomers strive the find the galaxy centered in the eyepiece. The methods are the same.
We have now completed the sessions on how to do celestial navigation. In the next session I will review a bit of history then I will describe some interesting diagrams to clarify our understanding of the present celestial sphere. These diagrams have an ancient origin and should not be forgotten.
In September 2017 on a cloudless weekend I would like to have VCAS members interested in doing actual Celestial Navigation meet me at Ventura Harbor for an afternoon sun sight. I will provide sextants and a GPS. If interested in participating, email our VCAS Outreach Coordinator, Gary Bostrup at vcasoutreach@gmail.com.
The challenge: Can anyone achieve an intercept of less that five (5) nautical miles?
If we have a GPS in our pocket the resulting position would provide a measure of the quality of our celestial navigation skills. We achieve a direct measure of our sextant sighting error in nautical miles (one minute of angle is one nautical mile). A perfect sight would result in an intercept (a) of zero, i.e. Hc=Ho. When using a DR position or AP the difference represents the uncertainty in the DR position.
Locate and mark the position of the DR, AP or known position. From there plot the intercept "a" in the direction of Zn either away from or toward the GP, and at the end of "a", mark a perpendicular line of position which represents a small section of the great circle. You are somewhere on that line of position. Repeat this with of two or more celestial sights and the lines of position will intersect at your actual or true position. Record the latitude and longitude of the line of position intersection.

End of Session Four


